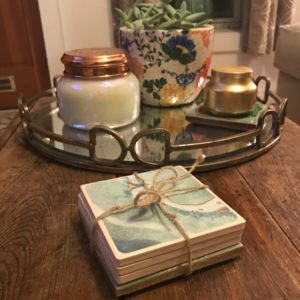
Easy to mak e and easy on the budget, these 4-Step DIY Coasters are super cute and add personality to any room. These coasters are complete in 4 quick steps and are ready to use in no time at all.
I enjoy DIY projects, especially if they are practical and easy on the budget. I’ve found that coasters make a perfect gift and also spruce up my coffee table… but they can also be used as favors for your guests, or you can make them to use at your upcoming event to match your party’s theme! Personalize your coasters with unique scrapbook paper found at Hobby Lobby and Michaels.
Last week, my sister-in-law and her friend came to visit us in Baltimore and we made these coaster sets one evening. We had some fun deciding which paper to use and if we wanted to make sets that all had the same print or choose multiple patterns to mismatch our coasters. As you can tell, we decided to use multiple patterns of scrapbook paper and they turned out so beautiful if I do say so myself. Some other thoughts on unique paper you could use (Newspapers with famous events, your favorite song lyrics typed on paper, or the fronts of flower seed packets cut to fit your coasters for a sun room or garden themed wedding.


Supplies:
You can purchase the majority of supplies directly from the links below.
Amazon Affliate Links:
Modge Podge
Sponge or Paint Brush
Felt Dots
Scissors
Scrapbook Paper – Hobby Lobby and Michaels have a wide selection
Ceramic Tiles – I found biscuit tiles at Lowes for less than $1.00 each. They’re super cheap! You can also purchase these at Michaels or Hobby Lobby

Step 1:
Cut your scrapbook paper to fit the coaster size. You can do this by tracing your coaster on the paper. I like to cut mine a little shorter on each side so it doesn’t fall over the edge of the coaster. Also, complete personal preference, you can round your edges or keep them squared off. I rounded my edges since the coaster had rounded edges.

Step 2:
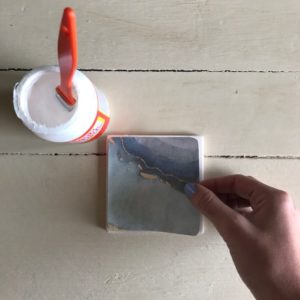
Modge Podge the top of your coaster using your foam brush and press your paper onto the coaster so it sticks. You can smooth it out with your hand to adjust the edges. TIP: The modge podge dries fast, so once your paper is placed, adjust it fast or it will be stuck to the coaster. Also, if your paper bubbles up, use a credit card to smooth it out.


Step 3:
Modge Podge thoroughly over top of your entire square paper and slightly off the edge so it adheres. Wait 10 minutes for it to dry. You will want to repeat this step 3 times.

Step 4:
After the coaster is dry, flip it over and apply the felt. If you bought pre-cut felt dots that already have adhesive, you can just apply them as is. If you bought a sheet of felt, make sure you cut it into tiny squares and use modge podge to secure the felt to each corner.

Repeat these steps on each of your coasters and Voilà! You’re finished and have beautiful coasters to do what you please! Remember to pin this to Pinterest and share with your friends! Would make for a fun girl’s night or project with your children at home!

Would love to get feedback below on this 4-Step DIY Coaster project and how your turned out! If you have any questions about the process, please don’t hesitate to reach out.
With Love,
